5 bushcraft skills everyone can learn: from igniting the campfire to whittling
Mastering basic bushcraft skills won’t just impress your fellow campers and give you a real sense of satisfaction, it might just be a lifesaver one day

The relentless march of technology has created a world where gear and high-tech gadgetry make many basic tasks easier, or simply does them for us, even in the great outdoors. For better of for worse, many take to the backcountry trails armed with GPS apps rather than a map and compass. Innovations in portable water filtration no longer mean we have to boil water collected from streams to make it safe to drink
Even something we take for granted, the simple lighter, considered by many as the most ingenious gadget of them all, replaced the traditional method of rubbing sticks or stone and flint together to start a fire. However, even with a lighter, you still need a certain level of bushcraft skill to get a blaze going in the wild.
Yes, bushcraft skills employing natural or simple tools are as relevant and rewarding to us today as they were essential to the hunter-gatherers, pioneers and frontiers-folk of the past.
The following are five bushcraft skills you can master with a little practice in the outdoors.
Meet the expert

Jasper's lifetime of travel has seen him utilize his bushcraft skills in various scenarios during his 'slow adventures'. Whether putting a tarp to use on his paddle-powered pursuits or working his way across the Sahara by bike, few people can boast his bushcraft experience.
1. Start a fire
- First, you'll need tinder and kindling
- For tinder, carry small wads of Vaseline-soaked cotton wool in a sealed container
- Otherwise, birch bark is best – pine cones, dried leaves, other barks all work well
- For kindling, gather twigs and create a tepee above the tinder
- Light the tinder and blow the ember into a flame
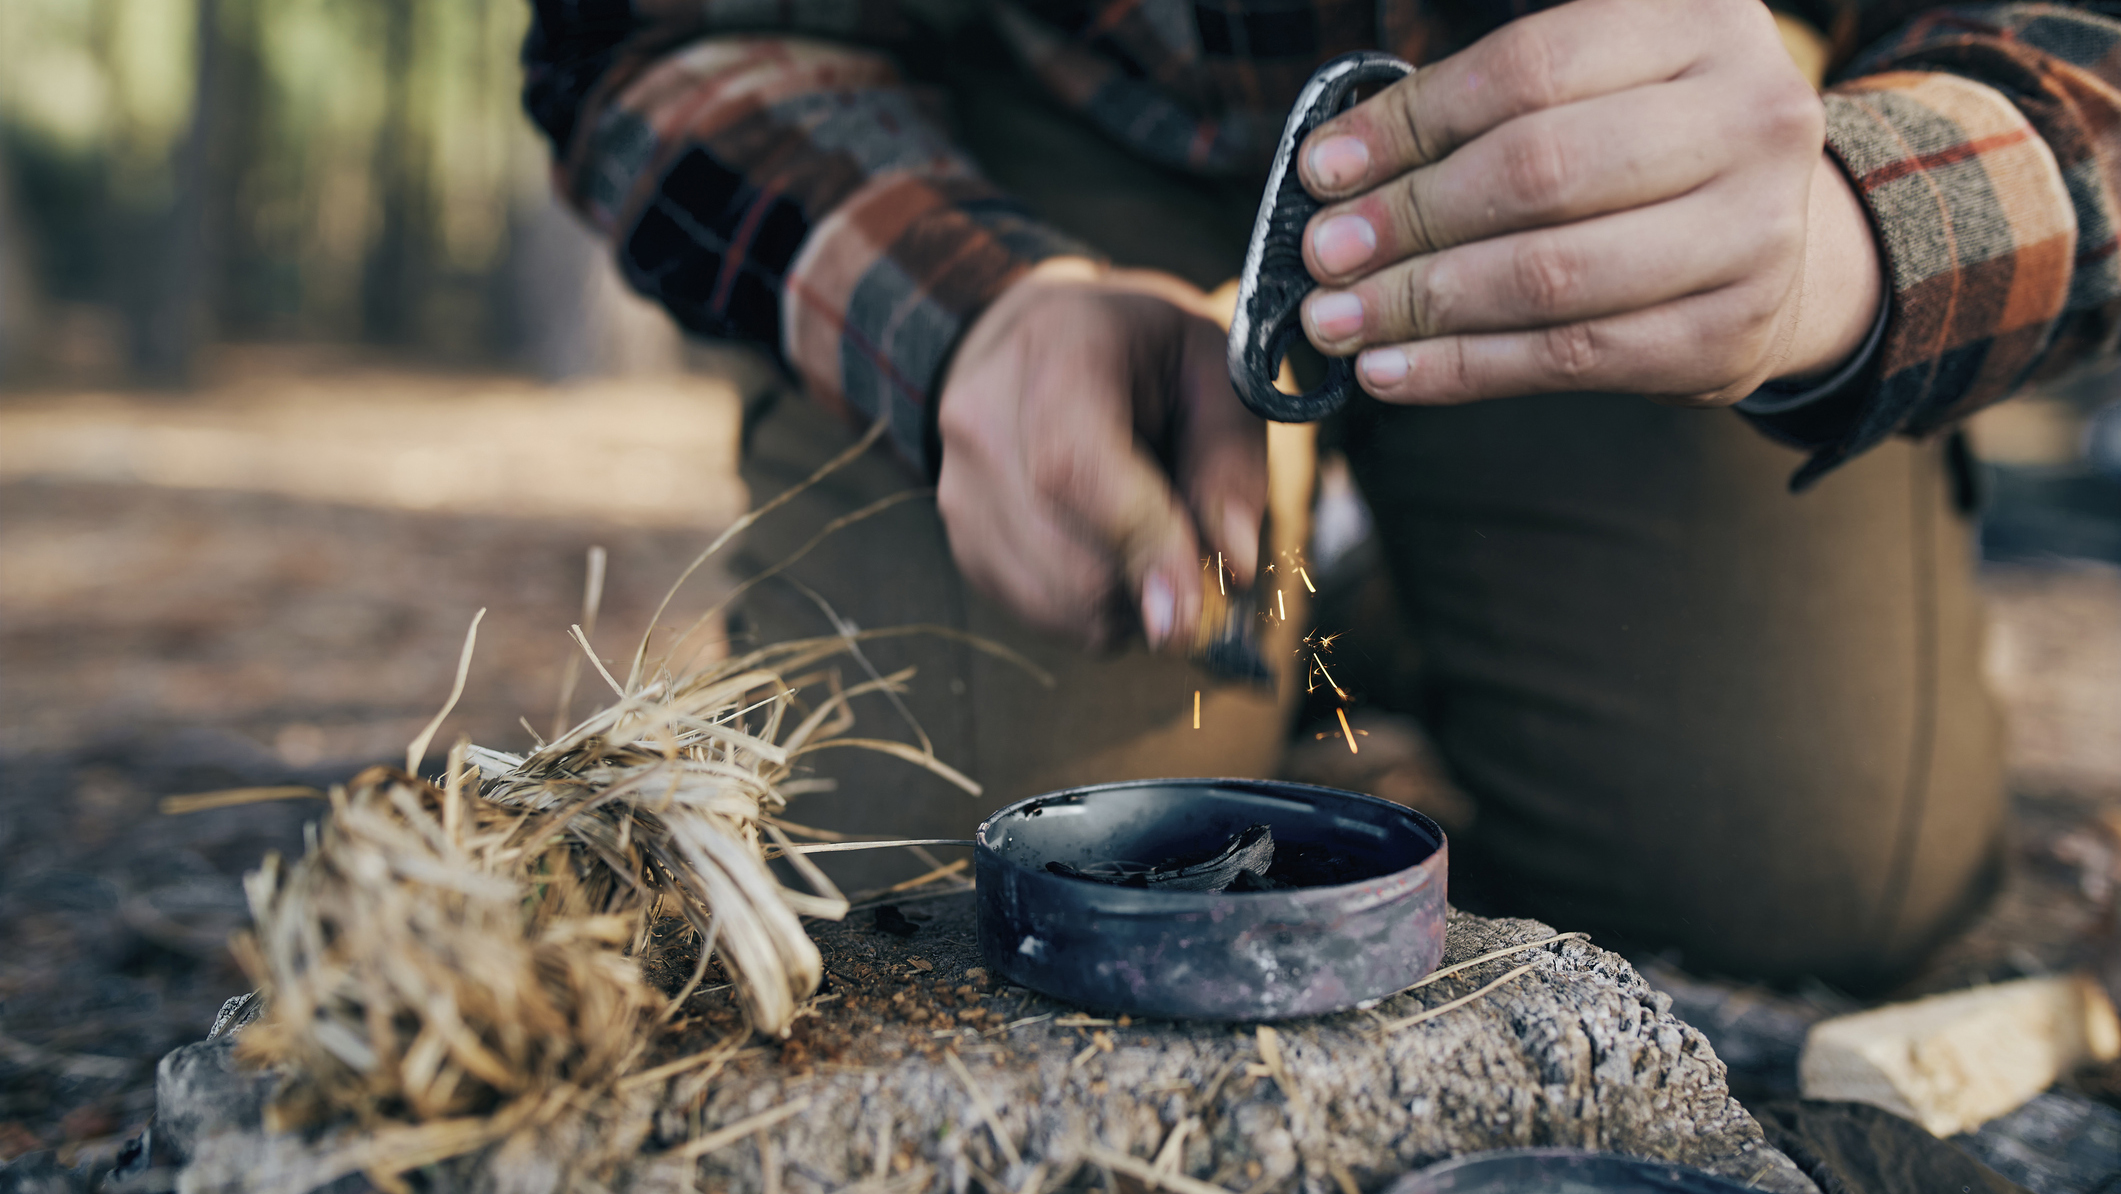
Making fire in the outdoors is a key bushcraft skill, and you won’t always have firelighters to hand to make it easy. Before you strike a match or spark your lighter, get things organized. First, you’ll need tinder and kindling. For tinder, I usually carry small wads of Vaseline-soaked cotton wool in a sealed container – they're light and dependably flammable. If caught without prepared tinder, I look for birch bark, which contains flammable oils, shred it finely and roll the thin strips into tight tangles. (Other barks, dry leaves, grasses, pine needles, scrap paper, tissues and other things also work well). Then get small twigs for kindling, and gather a pile of fuel wood – thumb-diameter upwards depending on the size of fire you need – ready to pyramid over the kindling when there's a flame.
Once you’re ready, make a ‘tepee’ with the small kindling – ideally split from dry, dead timber, and ranging in size from match to pencil thickness – on a dry surface, well sheltered from any wind, and with a space left for the burning tinder to be slipped into its heart. Place the tinder on a dry chip of wood, push the match or lighter into the tinder, and be ready to push the smoldering ball into the heart of the kindling when the flames catch. Then a little puff of breath to blow the ember into a flame, and the age-old magic of making fire casts its spell once again.
Tip: While matches and lighters are all well and good, a fire steel (or ‘fire striker’) such as the one made by Swedish brand Light my Fire is the most reliable way of starting a blaze in all weathers. Far easier than rubbing two sticks together, better than matches or a lighter in bad weather and good for thousands of strikes, a fire steel will work when soaking wet, in gusting winds and when your hands are too cold for more fiddly techniques.
Advnture Newsletter
All the latest inspiration, tips and guides to help you plan your next Advnture!
Ferrocerium fire steel rods are made from mischmetal – a mix of rare-earth metals, iron and magnesium – and when scraped with something hard like a knife blade they throw off sparks that burn, if only momentarily, at around 5,000°F/2,700°C. To use one, follow the instructions above to ready your fire, then push the steel's tip into the tinder, and scrape down the rod with a hard, sharp metal edge. Catch those sparks in a ball of tinder and you're well on the way to a blazing fire and a boiling billy can.
2. Put together a ‘possibles bag’
- Create a possibles bag of everyday carry items that could become essential survival kit
- What you carry will be down to personal preference
For America’s early frontiersmen a ‘possibles bag’ was a pouch to carry both those things that might be needed during a day away from camp, and items which could become essential survival kit if things went wrong. Black powder, skinning knives and flints might be outdated but the concept of filling a small bag with useful items as an everyday carry still makes sense. The choice of what to include is personal, based on your own experience and expectations. I use a small orange nylon drawstring pouch that fits into my daysack or a large coat pocket. Inside are obvious items like a small camping knife, lengths of strong cord, pencil and notebook, a tiny LED torch and one or more ways of making fire.
I also carry needles and thread, as well as a length of duct tape (wrapped around the pencil to save bulk), and important contact details are written on paper in case my phone dies. Something that has turned many a bleak situation into a happier adventure, is an 'emergency' $20 bill/£20 note (or a similar amount in local currency). Some people might want to carry a lightweight rain poncho, a power-bank for their phone, a spare pair of glasses, a bar of chocolate or earplugs. That's the thing about a 'possibles' pouch; its contents are all about your choices, your experience and whatever 'possibilities' you might expect.
3. Turn a tarp into a shelter
- Sleeping under a tarp feels much more like sleeping outside than in a tent
- The nature of erecting a tarp means there are many possible configurations
- A favored configuration is a 'wedge with ridge' where a supporting structure such as a bicycle or kayak paddle holds one end up
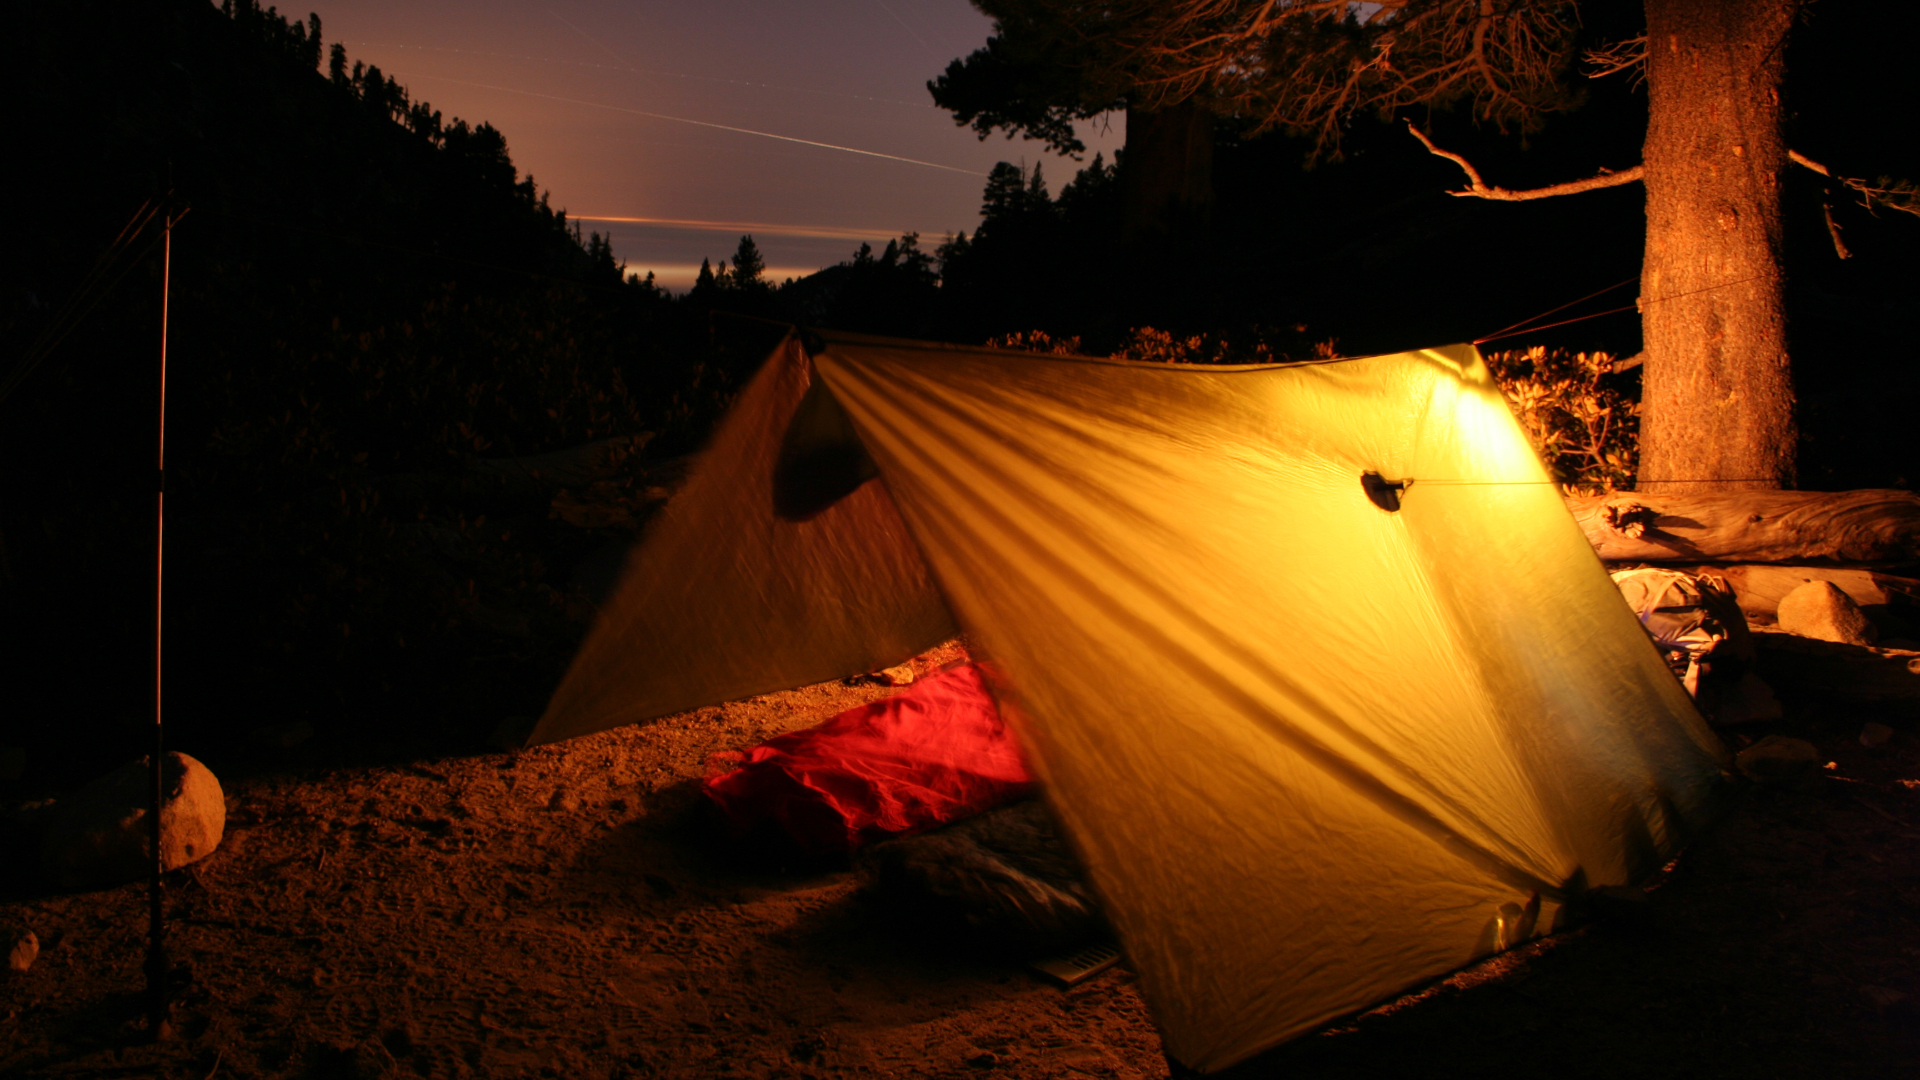
Sleeping under a lightweight tarpaulin is very different from a night in a tent; you're protected from bad weather but very much sleeping outdoors. There are many uses for a tarp, though this is one of the absolute classics With tarps, as with most all outdoor kit, there's a trade-off between cost, weight and functionality. For ultralight adventuring, a tarp around 8ft (2.5 meters) long by 5ft (1.5 meters) wide will be big enough, but carry something twice as wide and you'll be able to create more configurations to meet different conditions and weathers. The origami of folding, pegging, guying and stretching tarps mean that there are numerous ways of erecting a simple oblong of light fabric, and it's useful to experiment with various different shapes, but have at least one configuration that you know you can put up in the dark, in any location and in any weather.
My go-to shape for a tarp shelter is a 'wedge with ridge’. To put this up, peg one end of the tarp – the ‘foot’ – flat on the ground into the wind. Then raise the middle of the edge of the other end with a cord to a tree or over a bicycle, or kayak paddle, and then peg down the corners and the sides, so that the head end is a triangular opening facing away from the wind. Shove your backpack or extra kit down the foot end (both for storage and to raise the tarp high enough to create an air gap over your sleeping bag), and you're ready to shimmy in and got to sleep. It's a low profile set up that's snug against rain, and is well hidden for hole-in-the-wall-sleeping, but it pays to try and practise other setups to give yourself an arsenal of shapes for different terrains, weathers and tasks.
4. Learn your personal metrics for navigation
- Learning your average pace across different terrains is good knowledge for navigation nous
- It helps you plan and calculate how far you've travelled on any given day
- Time how long it takes you to walk a mile on flat ground, then apply this to other terrains
The word ‘navigation’ can scare some people, but in essence, it is little more than knowing where you are in time and space at any given moment – which is generally handy intel to have. To that end, learning and fine-tuning your own metrics can provide you with useful knowledge that pinpoints where you are, even after a day's wild walking. An understanding of what your average pace is across different terrains is good knowledge to have, for planning purposes and when you’re out there walking, wondering how far you’ve traveled. Make a note of how long, roughly, it takes you to walk a mile on a flat, good track. And how long on broken ground. How far can you walk in a day, and for several days in a row? What’s the optimum weight you can carry – the sweet spot, for you, between the joys of an almost empty pack and the benefits gained from carrying all the kit, rations and water that can make life on the trail more comfortable? Then, how accurate is your sense of time? Can you measure out the passing of five minutes accurately in your mind? What about an hour, or five hours?
The pleasing thing is that, with practice, you can hone your self-knowledge and tune into your inner GPS. Practise counting off time before you look at your GPS watch or phone. Measure out a mile on a map or an app and see how long it takes to walk. Scale-up that distance to get an average pace. I know that I walk at a steady four miles an hour with a daypack; just by knowing how long I've been walking since leaving a given point gives me useful information, and more so if I know what direction I've been walking in. And that brings in the other important skill in navigation, sharpening your observation to note where you're positioned in relation to weather, land contours, wind directions, the position of the sun and other natural and geographical phenomena. By learning more about your own metrics, you’ll gain a gauge to measure the wider world against.
5. Whittle the items you need in camp
- With a camping knife, you can craft all kinds of useful items from wood
- Useful items include tent pegs, wooden spoons, spurtles and spatulas
- Medium-density green woods are easier to work with than dead or hardwoods
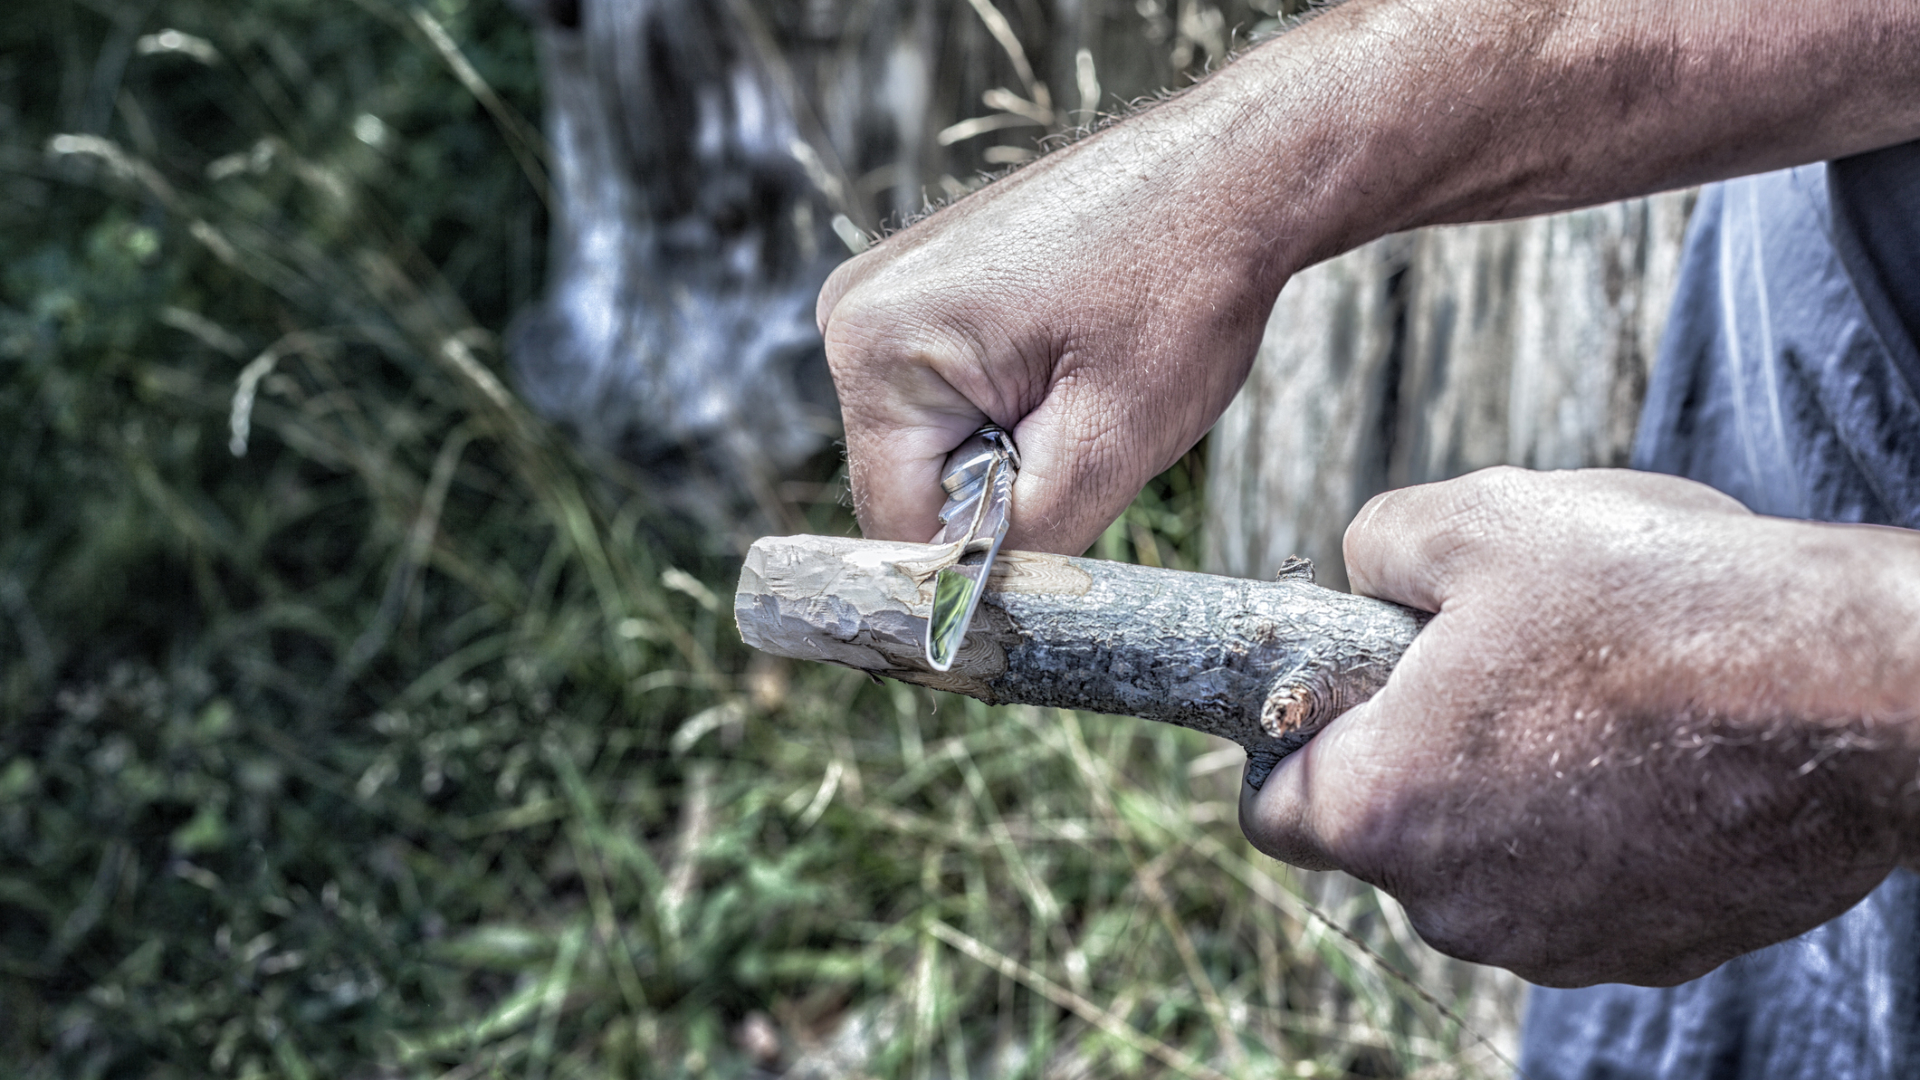
Wood is everywhere, and with a small, sharp knife and a bit of whittling knowledge it's easy to make useful bushcraft items that can make living outdoors easier and more comfortable. Pegs for pinning down a tarpaulin or tent guy-ropes are a good start; shave three or four inches of finger-thick stick into a point at one end, chamfer around the top of the other end to stop splitting when being driven into the ground, and add a small notch to hold loops or ropes. Job done. Making pegs establishes the common-sense techniques needed to whittle safely; push the knife away from you, hold the work with your other hand behind the cutting edge, don't steady the work against your leg while sitting down, and do use the thumb of your other hand to put controlled pressure on the back of the blade. A sharp blade cutting small slivers and shavings rather than hacking out chunks is the most efficient way to work. Learn to chip out small bits of wood with a scooping motion. Don't use too much force, just make smaller cuts. If your blade's looking a little too blunt for this, check out how to sharpen a camping knife.
Wooden spoons, spurtles and spatulas are all easy to whittle and allow you to design what you actually need, whether it's long handles to reach the bottoms of deep pots, angled edges for scraping into corners or wide blades for spreading peanut butter, jams and cheese on bread. Medium-density green woods are easier to work than dead or hardwoods. A wood traditionally used for kitchen spoons and other utensils is sycamore; it's common (easy to find), has straight grain, cuts easily and is tasteless and odorless making it an ideal wood to start on. Hazel and ash are good too, and harder woods like oak and beech can be whittled but take more effort and need reliable technique. Obviously, avoid poisonous trees like yew.
Try and envisage what you want to carve as you select your material so you can 'see' it in a branch of raw wood before you start work, and can incorporate natural curves and shapes into the design. You can carve most small items with a sharp knife, (learn how to sharpen a camping knife, and keep a stone or diamond sharpener to hand as you work), but if you get whittle crazy, a crook knife makes scooping out spoon bowls easier and neater, whilst many people use a small camping axe and chopping block to rough out shapes quickly before getting going with the knife. Keep it simple, though, because the joy of whittling is in sitting around a campfire making something useful with the simplest of tools and your very own hands. And the chippings and scrapings will come in handy as tinder for your next fire.
After a wild childhood in west Cork, Jasper Winn began embarking on long cycles, walks, horse journeys and kayak trips across five continents – adventures he’s decanted into books, magazine articles, radio and television documentaries. Keen on low-tech but good gear, Jasper is an advocate of slow adventures by paddle, pedal, saddle, boot and sail. He has circumnavigated Ireland by kayak and cycled across the Sahara. Twice. Having ridden north-to-south across Algeria he discovered the only way to get back was to turn round and pedal north again.
